Image Map

Wednesday, May 30, 2012

Sweet Potato Biscoff Cookie Bites

Wow! It's been way too long. I've missed all of you so much. We've been so busy over the past few weeks I haven't had an extra second to sit and spend time with all of you.
But I'm so glad to be back.
I know that I probably won't get to spend as much time with all of you as I have been in the past, besides, it is almost summer. And when it's 90 degrees outside with 100% humidity who wants to be stuck in the house typing away on the computer, in the air conditioning, with a nice cool drink in hand.
Not this girl!
 Kidding. I'm totally kidding!
But since I have two children who are more than happy to sweat off their entire body weight in one single day, I have a feeling I won't be spending as much time in here as I'd like.
Not to mention my new role in Cub Scout world.
But I will do my best.
I love being here and sharing my creations with you and I love it that you are so willing to share your creations with me.
Speaking of creations... here's my latest!
I found inspiration for these cookie bites here.
And since I'm more of a Cups kind of girl I decided to make them in a bite size mini-muffin pan.
I had never tasted Biscoff Cookies before, in fact, I had never even heard of them until I saw this recipe. I looked all over trying to find them, and finally it was my local CVS store to the rescue.
Biscoff Cookies have a wonderful rich coffee flavor with a slight hint of toffee.  
They were so good. Like, I have got to give these away because if I don't I'll eat the entire batch of them, good.
They remind me a little bit of Fall, but trust me, don't wait until Fall to make these.
Make Them Now!!


Sweet Potato Biscoff Cookie Bites

Crust

22 Biscoff cookies (there are more than 30 in a pack)
1/2 c butter – melted
2 tbs granulated sugar

Cake
1 1/2 c mashed sweet potato – room temp
1/3 c lightly packed light brown sugar
1 tsp vanilla
1 egg – room temp
1 c all purpose flour
1 tsp baking powder
1 tbs cinnamon
1/4 tsp salt
3 tbs melted butter – room temp

Cream Cheese Glaze
1/4 c cream cheese – room temp
1/2 c confectioners sugar
1 tbs cream or milk

Crust
Preheat oven to 375 F.
Crush your cookies in to fine crumbs using a food processor or put them in a plastic bag and crush them with a rolling pin.
Add melted butter and sugar. Mix well until all the crumbs are wet.
Press about 1 teaspoon of mixture into each muffin well. Make sure you press them firmly into the pan.
Bake for 7 minutes. Remove and let cool while you make your cake.

Cake
Turn oven to 350 F.
In a large bowl add sugar, egg and vanilla. Mix until no lumps remain. Add your sweet potato and mix well. Add in your flour, baking soda, cinnamon and salt all and once and mix just until no streaks of flour remain. It’s gonna be thick. Add in your melted butter and stir until the butter is incorporated into the batter.  Place a tablespoon of batter into each muffin well.
Bake for 15-18 minutes.

Cream Cheese Glaze
With an electric mixer beat cream cheese until smooth. Sift in confectioners sugar and add vanilla. Beat again until well mixed. Add your cream or milk to thin. If you want it a bit thinner just add a little more milk.
Drizzle over the top of each bite.

I also decided to pay homage to one of our most favorite people in our family who we recently said goodbye to. I inherited these adorable mini bundt pans from Aunt Kate and decided this would be a great recipe to try in one. I simply made the above recipe and baked it upside down in the cake pan. When I took it out of the oven and tried removing it from the pan, all of the crumbs scattered on the plate, but it was perfect! The bottom right picture above is the one I made in her pan. So Aunt Cake (Kate), we miss you very much, but I hope this makes you smile.


Thursday, May 24, 2012

Guest Blogger Thursday {yep, that's right}

So, I'm a bad blogger.
Well, I guess not so much a bad blogger as a bad scheduler.
I screwed up this week and scheduled two guest bloggers for Wednesday by accident. So instead of taking any spotlight away from either one of these lovely ladies, I decided to do a Guest Blogger Thursday this week too! I just hope that today's guest blogger, Sophie from My Happy Place can forgive me! Make sure everyone stops by her blog and show her some love, she needs a hug from the blogging world because of me.
Let's see what she's cooked up for us today shall we?
Welcome, Sophie from My Happy Place!

Hi everyone! I'm Sophie and I blog over at My Happy Place…
I'd love to thank Kim for letting me guest post today! Isn't her blog just adorable?!


I'm 14, homeschooled, and right now, I'm living in Namibia, Africa where
my family and I are missionaries… 

I have a passion for food, photography, anything 
vintage-y, and Paris, France. 

I'm often asked how I started baking at such a young age…
Well I come from a long line of bakers- 
My great grandma {I've only heard}, my grandma, and my mom
 are all AMAZING cooks and bakers. 
It's no surprise I kept that line going… :) 

Until about two years or so ago, I just occasionally helped my
mom or my grandma in the kitchen. I never really did any baking of my own.
When I started baking on my own, I instantly realized how much I loved
the feeling of taking a fragrant pan of cookies, muffins, or cake out of the oven. 

I then realized I wanted somewhere to share my recipes…
And that my friends, is how I started my blog.
At first I had my family and friends as followers, but now
I'm so blessed to have many more that I only wish I knew personally. 

Anyhoo…
I obviously was not going to stop by without sharing a yummy recipe!
Since it's almost summer, I've been thinking about
all the lemony recipes out there… I have a feeling this was
the first of many:) 

These cupcakes were a HIT with anyone who ate them! Just be careful not to shred
the white part of the lemon, because it causes an icky, bitter taste. I made that mistake,
 but when everyone else tasted them, 
they said they could hardly notice it… And before I knew it- the whole
pan had magically disappeared! 


Lemon Cupcakes with Lemon Cream Cheese Frosting
2 1/4 c. cake flour
1 tbsp. baking powder
1/2 tsp. salt
1 1/4 c. milk
4 egg whites
1/2 tsp. lemon extract 
{I used the juice of about 1 lemon since the lemon extract here tastes not very appetizing…
I thought it tasted like cleaner. And no one in the right mind would like to eat cleaner-flavored cupcakes!}
1 1/2 c. sugar
zest of 2 lemons
1 stick butter
1 tsp. vanilla

Frosting:
2 {8 oz.} pkgs. cream cheese, softened
1 stick butter, softened
2 lbs. powdered sugar
2 tsp. vanilla
juice of one lemon

Preheat oven to 350ºF and spray of line a muffin tin. Sift together flour, baking powder, and salt. Whisk milk and egg whites in a medium two. Put the sugary and lemon zest in a bowl and rub together until the sugar is moist and fragrant. Add butter. Beat in extracts, then add 1/3 of the flour. Beat in half of the milk egg mixture, then beat in half of the remaining dry ingredients. Add the rest of the milk and eggs and add the last of the dry. Place the batter into the cupcake tins. Bake for 18-22 minutes or until a toothpick inserted in the middle of a cupcake comes out clean. 

Let cool before frosting. Top with shredded coconut.

Bon Appetite! 

Thanks for having me Kim!

Loves,
Sophie

Wednesday, May 23, 2012

Guest Blogger {six}

Happy Wednesday Everyone! I'm so happy to be back. We've had a very busy few weeks with Cub Scouts, camp, Blue & Gold. It's been a whirl wind of cookies, cook-outs and creepy crawly critters.
I wouldn't change it for the world!
Well it's Guest Blogger Wednesday, so without furter ado...Say Hello to Shatzi from Love & Laundry!
Hi! My name is Shatzi.  I’m so excited to be here on Cups by Kim today! Kim was one of the first blogs I followed and I always look forward to her yummy recipes and funny stories. Her blog is one of my favorites, for sure!
I blog over at Love and Laundry where you’ll find a little bit of everything.  I’m a mother of 3 kiddos. And I love cooking, sewing, crafting, gardening and anything else fun I can do with my spare time. I’m always learning new things and thinking up crazy ideas.   I blog about it all along the way.  I’d love it if you stopped by my corner of the internet and said “Hi!”

love and laundry

Today I’m sharing one of my very favorite recipes.  It’s called Stromboli.  Stromboli is kind of like a rolled up sandwich. There are tons of different ways to make it and this is my favorite way.
Stromboli

Here’s what you’ll need to get started:
stromboli ingredients

This comes together really fast. For the dough, you can use any bread dough you want. If you want something super fast, just use store bought bread dough. I like to make mine homemade. If you need a good recipe, here’s the one I always use. You only need enough bread dough for a single loaf.
Before I assemble the Stromboli, I like to get all of the ingredients ready.

First, chop the onion. You really only need about 1/3 cup of onion. 
DSC_0053

Then chop the olives (unless you were smart and bought chopped olives – I didn’t have any on hand).
DSC_0054

And slice your tomatoes.
DSC_0062

When your ingredients are prepped, it’s time to assemble this bad boy.  Start by rolling your dough into a huge rectangle. Mine was about 17-inches by 15-inches.  It really does not have to be perfect.  It’ll look pretty no matter how uneven your dough rectangle looks, I promise.
DSC_0067

Then, layer your ingredients.  I always start with the cheese:
DSC_0072

Then add ham:
DSC_0073

More cheese:
DSC_0074

And a layer of olives and onions:
DSC_0076

And finally slices tomatoes:
DSC_0077

It’s really easy to roll up your Stromboli.  Just start at one end, and fold it half way in:
DSC_0078

Then, fold the other side on top:
DSC_0079

Pinch your edges closed. Especially the two short ends, otherwise you’ll have cheese leaking out.
DSC_0081

Transfer the Stromboli to a baking sheet.  Meanwhile, beat the egg with a little bit of water.  Then, brush the egg wash all over the outside of the dough.
DSC_0083
If you’re having problems with any of the edges staying shut, you can use the egg wash as a glue to hold the edges together.

Finally, sprinkle the basil and oregano all over the top of the Stromboli
DSC_0097

Bake the Stromboli at 375 degrees for about 30 minutes.  Then, enjoy!!  This is a great recipe for a crowd. It’s really filling and feeds a lot.
Stromboli 2

Thank you so much, Kim for having me!  It’s been tons of fun!!

Thanks Shatzi for sharing that amazing recipe with all of us! I think I know what I'm fixing for dinner!! I want to wish all of you a great week and see you all back here Sunday for Sweet & Simple Sunday... it's been a couple of weeks and I can't wait to see what everyone has been up to!! And I think it just might be time for another giveaway! Guess you'll have to wait and see!!

Tuesday, May 15, 2012

Guest Blogger Wednesday {five}

G'day Everyone!
I'm a little busy this week getting ready for Cub Scout camp so I'm so happy that Pamela is here to share a great recipe with all of you!
Take it away Pamela!

 I am so excited to be guest posting here at Cups by Kim, I love looking at her blog, she has such awesome recipes, and her pictures are so beautiful.  Thank you for the opportunity Kim.  My name is Pamela and I blog over at Pamela's Heavenly Treats , I am a wife, mother of 6, homeschool teacher and I have a small Healthy Cupcake & Cookie business. Everything that I make is made with 100% Whole Wheat Flour and my secret ingredients. You will not know that you are eating healthy when you taste these treats.

I decided to make these cookies, and I am glad I did, the entire family liked them, they get a thumbs up, and the best part is you can eat them single or as a cookie sandwich, all you need is a glass of milk and you will really have a heavenly experience.  I saw this recipe over at Megan's Cookin and I just tweaked it to make it a little healthier.

Ingredients

1/2 cup unsalted butter (softened)
1/2 cup light brown sugar
1/2 cup nutella
1 egg
1/2 tsp vanilla
1/4 tsp salt
1 1/2 cups whole wheat flour
1 tsp baking powder
1/3 cup of chocolate chips

Directions
Set oven to 350

Cream butter and sugar in a mixer on high speed, scraping the sides of the bowl often.
Beat until light and fluffy.
With the mixer on low, add the egg and vanilla.
Add the Nutella and mix well.
Add the flour, baking soda, and salt and mix on low speed until all the ingredients are incorporated the dough is smooth.
Fold in chocolate chips.
Using a small ice cream scoop, scoop into balls and place on a parchment covered baking sheet.
Bake for 8 minutes
Let cookies cool about 5 minutes and transfer to a wire rack to cool completely.
You can leave the cookies singles, or spread about a teaspoon or so on the flat side of half the cookies, and top with another cookie to make a Nutella Cookie Sandwich.

I want to give a big thank you to Kim for allowing me to share my healthy treat with her readers.  Please stop by Pamela's Heavenly Treats to get some healthy cupcake and cookie recipes.  I also have an etsy shop where you can get my cupcake and cookie mixes.


Saturday, May 12, 2012

It's a Trading Blogs Party!!

Well today is the

You can find me guest posting over at
What's Cooking Love
But first, make sure you check out this amazing recipe that Alyssa from
What's Cooking Love
cooked up for all of you!
Hello all of my blog lovers out there! I'm out and about today, so Alyssa from What's Cooking Love & I signed up for a Blog Swap! If you've never seen a blog swap before, stop by Serendipity & Spice and check out what's going on! Of course, read Alyssa's post here first and then stop by her page to check out what I made! So without further a'do...

What's Cooking Love

Hi, I am Alyssa from What's Cooking, Love?
I am so excited to be swapping blogs with Kim from Cups by Kim.
We are participating in the blog swap hosted by Melissa at Serendipity and Spice.  


I love Kim's blog, she has some great looking posts and recipes.  Her cupcakes and other recipes look so good.  Thank you so much to Kim for having me on her blog today. I appreciate this opportunity!
Make sure that you check out Kim's post at my blog.  


I am a wife to my wonderful husband and a mother to my 11 month old son.  I like to blog about cooking and love food!  My blog is about cooking easy, good food, using shortcuts and timesavers.  I also host a weekly link party, Showcase Your Talent Thursday.  I hope that you stop by and visit.  


When I saw that I was paired with Kim for Trading Blogs, I thought that I should do something with cups, since that is one of the main themes of her blog.  I love cookie cups, so I though that I would do something with that.  When I was in the store last week, I found that they now have flavored marshmallows. I picked up a bag of Cinnamon Bun Marshmallows to use in a recipe. I thought that this was a good opportunity to use the marshmallows
These Cinnamon Smores Cookie Cups are really easy to make and taste really good.  They are just like Smores in cookie form, with the added bonus of cinnamon flavor. In the cookie, there are chocolate chips, cinnamon chips, cinnamon graham crackers, and cinnamon bun marshmallows (You can also substitute regular marshamallows).  You can also added a melted chocolate topping to the top of the cookie cup.  I liked the cookies both with the chocolate and without the chocolate topping.
These cookies are so good and tasty with the added bonus that they are so easy to make.  Now you can have Smores anytime of the year.  I hope that you try these cookies!

Cinnamon Smores Cookie Cups

1 pouch Chocolate Chip Cookie mix

1/2 cup butter (1 stick), softened
1 egg
1/3 cup cinnamon graham crackers, crushed
1/3 cup cinnamon bun marshmallows, chopped into 4 pieces (can substitute regular marshmallows)
1/4 cup cinnamon chips
1/4 cup semi-sweet chocolate chips (optional topping)


1.  Preheat the oven to 350 degrees.

2.  Stir the chocolate chip cookie mix, butter, and egg together in a large bowl until soft dough forms. Then add the crushed graham crackers, cinnamon bun marshmallows, and cinnamon chips and stir to combine.  

3.  Roll the dough into a rounded teaspoonful and place one ball in an ungreased muffin tin pan.  Repeat for the rest of the cookie dough balls.   Bake for 8-10 minutes.  Cool the cookies for 5 minutes.  Then melt the chocolate chips in the microwave in 15 second increments until they are melted. Then either leave the cookies plan or drizzle or spoon the melted chocolate on top. 


*Alyssa*


Linked to these parties


Thank you so much to Kim for switching blogs with me!
I hope that you stop by and visit me at What's Cooking, Love?!
You can also follow me on FacebookPinterest, or by RSS Feed

Thanks!

Friday, May 11, 2012

Sweet & Simple Sunday 8

I'm so excited about this weeks
Sweet & Simple Sunday
I have a surprise for all of you! But you'll have to hold on a minute until I show off these amazing recipes that you linked up last week!
I picked four features this week based on your clicks.
Aren't you guys so glad that inlinkz is out there.
Can you imagine trying to figure all of this out on your own!
So here you go. Your most favorite posts from Sweet & Simple #7.

White Chocolate Decadence Bars from Life's Simple Measures

Zebra Stripe Cake Pops from Life is Sweets

Churro Popcorn from Melissa's Cuisine

Chocolate Caramel Crunch Cake from Michelle's Tasty Creations
Make sure you stop by and give them some love! And if you've been featured make sure you pick up a button on your way out!
Now on to the other exciting news!
Cups by Kim along with Natural Garden Soaps 

 is teaming up for a giveaway!
Yay!!
I was lucky enough to win some soaps from Natural Garden Soaps and Ginger Snap Crafts during her Blogaversary Giveaway.
When I got this soap in the mail I could hardly wait to open the package and hop in the shower, but it was right in the middle of my crazy day so I had to wait.
All of her soaps and products are 100% Natural.
She offers everything from bar soap to sugar scrubs,and did I mention it's all 100% Natural!
Her soaps smell absolutely amazing, and her washcloths are not only cute, but they are so soft and beautifully made.
Paula has offered to give one of my readers one of her very popular gift packs.
(Isn't it adorable!!)
What you will recieve:
1 Handmade Washcloth
1 All Natural Bar Soap
All packaged in a cute little Gift Tote

So how do you win this you ask. Well, here's what you need to do. Click on the Giveaway Link at the bottom of the page and enter to win!
One winner will be chosen at random and will be notified by email.

Now that you're all excited and ready to get started...show me what 'cha got!
Link up all of your sweets, treats, crafts, tips, whatever you've been up to!
Thanks again for stopping by and good luck!

a Rafflecopter giveaway

Wednesday, May 9, 2012

Guest Blogger Wednesday {four}


My middle name is Louise (that's French for dessert!)
Hello Hello!  I'm Karen.  I blog at Somewhat Quirky and very glad to be here at Cups By Kim today!  I am an enthusiastic maker of things - and things include foods of all kinds.  My favorite foods to make - and to eat - are desserts. 

I'm pretty good at other stuff to, but dessert makes my heart go dancin!  The fancier the better.  In my mind a cake is good but a cake with icing, cheesecake, oreos and oreo truffles is even better!  But alas, I have sworn off cake for a month or two so I picked something a little more moderate for today's visit.  

Actually I brought two recipes with me today - a dessert and an appetizer.  Both recipes are inspired by impending summer celebrations - like my birthday!  When I am having, or going to, a summer eating event, I like to bring things that are easy to transport and eat (especially for children).  It is also important that they can withstand variances in temperature - for safety.

Last week we were having some friends over for a make your own grilled cheese party- because April is Grilled Cheese Month - and I wanted something fun and simple for dessert.  I had these on my Pinterest board and thought they would be perfect for this casual dinner.  It is a Pampered Chef recipe and who doesn't love those? Did you know they have like 15 pages of recipes with cream cheese in them?  But I digress...


S'more Cups
7  whole graham crackers (1 cup finely crushed)
1/4 cup powdered sugar
6 tablespoons butter, melted
4 bars (1.55 oz each) milk chocolate candy
12 large marshmallows


Preheat oven to 350 degrees F.

Place graham crackers into a large resealable plastic bag. Crush into fine crumbs.


Combine graham cracker crumbs, powdered sugar, and butter in a small bowl.


Place 1 tablespoon of crumb mixture in each cup of a mini muffin pan. For reference - this is a soup spoon - heaping.  Press crumbs to form shallow cups. 


Bake 4-5 minutes or until edges are bubbling. 

While crusts are baking, break 2 of the candy bars into their  marked rectangles.  Cut 12 marshmallows in half with scissors dipped in cold water.

Place one chocolate rectangle in each cup.  Cover with 1/2 marshmallow - cut side down.

Return to oven 1-2 minutes or until marshmallows are slightly softened. Remove pans from oven to cooling rack; cool 15 minutes. 

Carefully remove cups from pan. Cool completely.


Break up remaining candy bars into microwave safe bowl.  Microwave on high 1 to 1 1/2 minutes or until melted and smooth, stirring every 20 seconds. 

Dip the top of each marshmallow into melted chocolate.  Let stand 40 to 60 minutes or until set. 


Makes 24 cups.  I recommend using some type of lining over the serving tray.  The butter in the crust seeps ever so slightly and the cloth or napkin lining will keep your treats from having buttery bottoms.  Buttery bottoms are just rude!


Yummy!!!  These can be warmed in the microwave BUT GENTLY - like 10 seconds at 50% power.

Ok.  Now it is time for the appetizer - which comes with a mantra.....LOOKS GROSS, TASTES GREAT!  There have been times when I have had to strongly encourage people to try it.  I don't even really like any of the ingredients, except avocado, by themselves.  But together, they are heaven.  This is the kind of dip that people stand around at the end of the party and eat every last drop - saying things like "I can't believe how good this is!  OMG!  Can I have the recipe for this.  OH GOD this is soooooo good.......

Blackeye Pea Dip
(also known as Looks Gross But Please Try It I Know You'll Like It Dip)


2 cans Blackeye Peas (slightly drained)
2 avocados
1/2 cup sweet red onion chopped
1 1/2 cup chopped celery
5 oz Catalina dressing


Texture and size of ingredients are key to the taste of this dip so I'm going to give you a little additional info to encourage you...  It only takes about 15 minutes to make this dip, just stay calm and use your fabulous knife skills!
Drain peas.  I know you know how to drain I just wanted you to see what slightly drained means.  The pasty liquid will remain - the watery liquid will be gone.

Tip: If you have access to Ranch Style brand of beans - all their beans are excellent.  My favorites.  Like so favorite that when I visit Oklahoma, I go to the grocery store and by cases of black beans to bring home with me because we don't have them here (and beans cost a lot here).  


Tip: 1 1/2 cups of celery is usually 3 stalks.

Holding the thick end of the stalk, insert the tip of your knife about 2 inches up into the stalk.  Run the knife up the stalk to divide it in half.  Do the same to each half so you have 4 strips. 


Put the strips "back together" and chop - leave your knife in one place and push the celery towards the cutting edge.  Just rock the knife up and down chopping as you push the celery through.


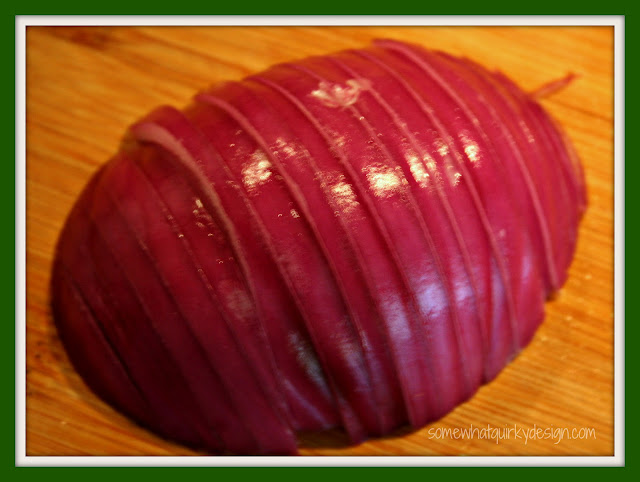
Cut your onion.  

Tip: 1/2 cup of chopped onion is usually about 1/5 of a large red onion. (see knife placement)


Lay onion slice on cutting board an cut into thin strips.  As you did with the celery, place the knife tip ON THE BOARD and push the knife down through the onion as you hold it in place with your other hand.  Avoid putting the knife on TOP of the onion and pushing down.  That is dangerous.


Turn the cutting board 1/2 turn so that you can cut perpendicular to the cuts you just made.  Hold onion steady and chop as before - tip of knife on board, pushing onion toward the knife after each slice.  (sorry for the blur - it's hard to take your own knife shots - looks like Mr Quirky has shaky hands)


Check to make sure your size approximation was accurate.  I get nervous about raw onion, and don't want to have too much.


Now cut your avocado.  Make one continuous slice around avocado - starting and ending at the top.  Twist the halves and pull apart.  Hold the seed side in one hand and with your knife in the other hand make a whack at the seed - hard enough so the knife breaks into the seed.  When you twist the knife the seed will come out.


Cut lengthwise slices into the avocado - just dragging knife against the skin, not breaking it.  This is actually easier with a table knife - you don't need a sharp knife for this.  Turn avocado and make perpendicular slices.   Then you can either scoop out pieces by moving a spoon gently around the edges of the peel or you can push the avocado half "inside out" and scrape off the pieces that don't fall off. 

These pieces will be too big so cut them in half to be more uniform with the other ingredients.


Put all ingredients into a bowl, add the Catalina dressing and mix thoroughly.  Put in fridge for a few hours for flavors to mix well.

Serve with Fritos Scoops.  Only Fritos Scoops.  Actually I've never eaten it with anything but Fritos Scoops - but I do consider the corn chip to be an essential part of the flavor.  Plus this dip is pretty dense and requires a thick chip to maneuver it with.


Notice how the ingredients are fairly uniform in size?  This is KEY!   It is the combination here that makes it taste so good.  You want to taste everything together, not just get a hunk or raw onion or celery.  That would be a travesty!

Note: This makes enough dip to fill the bowl in the picture at least two times.  There are two small bags of Fritos in the picture.


Enjoy the party!

You may have figured out that this is actually fairly healthy!  If there is ever any left over we usually eat it the next day for lunch.

Thank you Kim for letting me visit with you and your readers today!

And as I always say....

Make something wonderful today!

Karen

Thanks Karen for stopping by and sharing those amazing recipes. Now I'm craving S'mores! I'd like to invite everyone over to Sweet & Simple Sunday! Share your sweets & treats and make sure you sign up for the giveaway for a gift tote from Natural Garden Soaps!